

Get ready to meet your new favorite weeknight hero: Breaded Chicken Skewers!
There’s something irresistibly fun and nostalgic about food on a stick, don’t you think? These golden, crispy chicken skewers are the perfect bite-sized indulgence—perfect for dipping, sharing, or simply savoring one delicious skewer after another.
The idea of breaded and fried chicken isn’t new, but threading those juicy strips onto little skewers? Genius. Some say this method hails from old Italian street food traditions, where meats were skewered, breaded, and fried for easy, on-the-go meals. Others think it was simply a creative home cook’s way of making dinner a little more exciting (and let’s be honest, kids LOVE anything on a stick). Either way, trust me—you’re going to love this crispy, flavorful twist. It’s like chicken nuggets, but way cooler and more satisfying.
Why You’ll Love Breaded Chicken Skewers
This recipe isn’t just about the ingredients—it’s about creating moments. Whether you’re cooking for a casual family dinner, hosting a get-together with friends, or simply indulging in some comforting flavors for yourself, this dish is versatile enough to fit the occasion.
Is this Breaded Chicken Skewers recipe for you? Let’s see. Breaded Chicken Skewers are…
- Crispy on the outside, tender on the inside. That perfect bite you crave, every time.
- Flavor-packed and well-seasoned. Every piece is savory, herby, and utterly delicious.
- Fun to eat and even more fun to serve. Because who doesn’t love food on a stick?
- Perfect for dipping. Pair with ranch, honey mustard, or even a spicy aioli.
- Quick and easy to whip up. Minimal fuss, maximum satisfaction.
Quick Tip: Soak your wooden skewers in water for about 30 minutes before using to prevent burning during frying!
Ingredients in Breaded Chicken Skewers
Here’s the magic of these skewers—they’re made with simple, everyday ingredients that come together for something truly special. Let’s break it down:
Chicken Breast: The heart of the recipe! Tender, juicy strips that soak up all the seasoning and stay beautifully moist after frying.
Italian-Style Breadcrumbs: Bring all that herby, cheesy goodness to the party, creating a golden, flavorful crust.
Mayonnaise: Acts as the perfect binder to help the breadcrumbs stick and adds a subtle richness that keeps the chicken juicy.
All-Purpose Seasoning (Without Salt): A perfect blend of spices to amp up the savory notes without overpowering the other flavors.
Fine Sea Salt: For just the right amount of seasoning to bring everything to life.
Black Pepper: Adds a hint of gentle heat and complexity.
Extra Light Olive Oil: Ideal for frying because it has a high smoke point and a neutral taste that lets the seasonings shine.
Small Wooden Skewers: The secret weapon! Not just for fun—threading the chicken ensures even cooking and easy serving.
(Note: the full ingredients list, including measurements, is provided in the recipe card directly below.)
Instructions
Let’s dive into the steps to create this flavorful masterpiece:
Preheat Your Equipment:
Start by heating your oil in a large skillet over medium heat. You want it nice and hot, but not smoking—about 350°F is perfect for frying.
Combine Ingredients:
In a medium bowl, mix the breadcrumbs, seasoning, sea salt, and black pepper. In a separate bowl, add the mayonnaise. Toss the chicken strips in the mayo until they’re fully coated—it’s messy but oh-so-worth it!
Prepare Your Cooking Vessel:
Lay out a plate lined with paper towels nearby for draining the cooked skewers. Trust me, you’ll want it ready.
Assemble the Dish:
Thread each mayo-coated chicken strip onto a skewer. Roll the skewered chicken in the seasoned breadcrumbs, pressing lightly so the coating sticks.
Cook to Perfection:
Carefully place a few skewers at a time into the hot oil. Fry for about 2–3 minutes per side until golden brown and cooked through. Don’t overcrowd the pan—it keeps the oil temperature steady for a better crisp!
Finishing Touches:
Remove the skewers and let them drain on the prepared plate. Sprinkle with a little extra salt if you like.
Serve and Enjoy:
Serve these beauties warm with your favorite dips. They’re perfect for a casual dinner, an appetizer spread, or even a fun lunch!
How to Make Breaded Chicken Skewers?
Fresh Salads:
Pair it with a crisp green salad dressed with a lemony vinaigrette for a refreshing contrast.
Crusty Bread:
Serve with warm, crusty bread or garlic bread to mop up every last delicious crumb.
Creamy Accompaniments:
A dollop of ranch dressing, spicy sriracha mayo, or herbed Greek yogurt will take these over the top.
Vegetable Sides:
Roasted veggies like carrots, broccoli, or asparagus make a colorful and nutritious plate.
As a Standalone:
Sometimes you just need a plate full of crispy chicken skewers and nothing else—no judgment here!
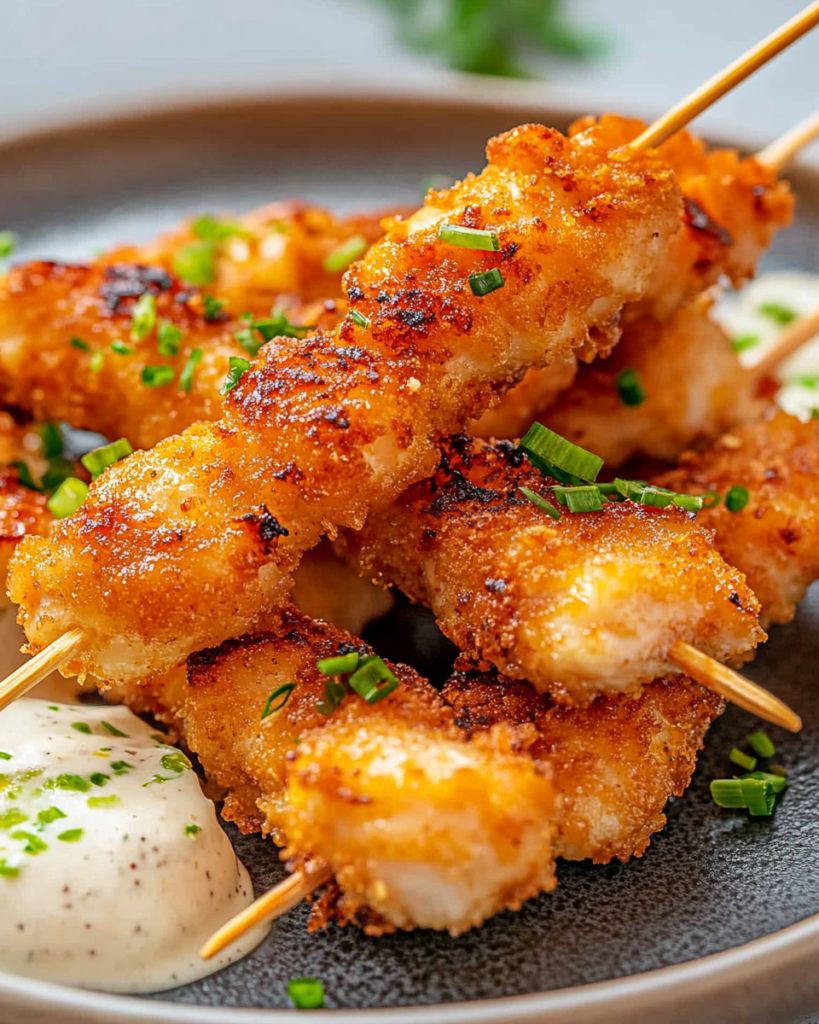
Presentation matters too! Arrange the skewers on a platter, sprinkle with chopped parsley, and maybe add a little drizzle of olive oil for that chef’s kiss finish.
Nutrition Information (Per Serving)
- Serving Size: 1 skewer
- Calories: 210
- Sugar: 1g
- Sodium: 320mg
- Fat: 13g
- Saturated Fat: 2.5g
- Unsaturated Fat: 9g
- Trans Fat: 0g
- Carbohydrates: 5g
- Fiber: 0g
- Protein: 18g
- Cholesterol: 55mg
How to Serve Breaded Chicken Skewers?
Serve them hot and fresh right out of the pan, alongside dipping sauces like ranch, spicy mayo, or honey mustard. They also make a stellar addition to party platters, brunch spreads, or even tucked inside pita bread with a few crunchy veggies for a handheld treat.
Additional Tips
Prep Ahead:
You can thread and bread the chicken ahead of time! Just refrigerate until ready to fry.
Spice It Up:
Add a pinch of cayenne or paprika to your breadcrumb mix if you want an extra kick.
Dietary Adjustments:
Swap out regular mayo for avocado mayo for a different flavor twist, or use gluten-free breadcrumbs to cater to dietary needs.
Storage Tips:
Leftovers can be stored in an airtight container in the fridge for up to 3 days. Reheat in a 375°F oven for 8–10 minutes to get them crispy again.
Double the Batch:
Trust me—you’re going to wish you made more. These freeze great! Just reheat from frozen in the oven.
Tips & Variations / Quick Tips
- Secret Tip: For ultra-juicy chicken, let your coated chicken rest for about 10 minutes before frying.
- Ingredient Substitutions: Don’t have Italian breadcrumbs? Use panko with a sprinkle of Italian seasoning!
FAQ Section
Q1: Can I substitute mayonnaise with Greek yogurt?
A1: Absolutely! Greek yogurt works great as a binder and adds a slight tang.
Q2: Can I make this dish ahead of time?
A2: Yes! Prep the skewers and refrigerate them until you’re ready to fry.
Q3: How do I store leftovers?
A3: Keep them in an airtight container in the fridge for up to 3 days. Reheat in the oven for best results.
Q4: Can I freeze this dish?
A4: Yes! Freeze the cooked skewers in a freezer-safe container for up to 2 months. Reheat in the oven straight from frozen.
Q5: What’s the best way to reheat this dish?
A5: Reheat in a 375°F oven until warmed through and crispy—about 10–12 minutes.
Q6: Can I double the recipe?
A6: Definitely! It’s perfect for feeding a crowd or stocking your freezer with ready-to-go meals.

Breaded Chicken Skewers
Ingredients
- 2 pounds chicken breast cut into ¾-inch strips
- ¾ cup Italian-style breadcrumbs
- ¾ cup mayonnaise
- 1 teaspoon all-purpose seasoning without salt
- ¾ teaspoon fine sea salt
- ½ teaspoon black pepper
- Extra light olive oil for frying
- 12 small wooden skewers
- For serving:
- Lemon wedges
- Fresh parsley
- Your favorite dipping sauce
Instructions
- Marinate the Chicken:
- In a large bowl, combine the chicken strips with salt, pepper, all-purpose seasoning, and mayonnaise.
- Cover and refrigerate for at least 1 hour, or up to overnight.
- Prep the Skewers:
- Thread marinated chicken strips onto wooden skewers, keeping flat sides aligned for even cooking.
- Bread the Skewers:
- Pour breadcrumbs onto a large plate.
- Roll each skewer in the breadcrumbs until fully coated.
- Fry the Skewers:
- Heat a generous amount of extra light olive oil in a large nonstick skillet over medium heat.
- Cook the skewers for about 3 minutes per side (6–8 minutes total), until golden and the internal temperature reaches 165°F.
- Drain and Serve:
- Transfer skewers to a paper towel-lined plate.
- Squeeze fresh lemon over the top, sprinkle with parsley, and serve with your favorite dipping sauce.